Why Built-In Bookshelves Transform a Room
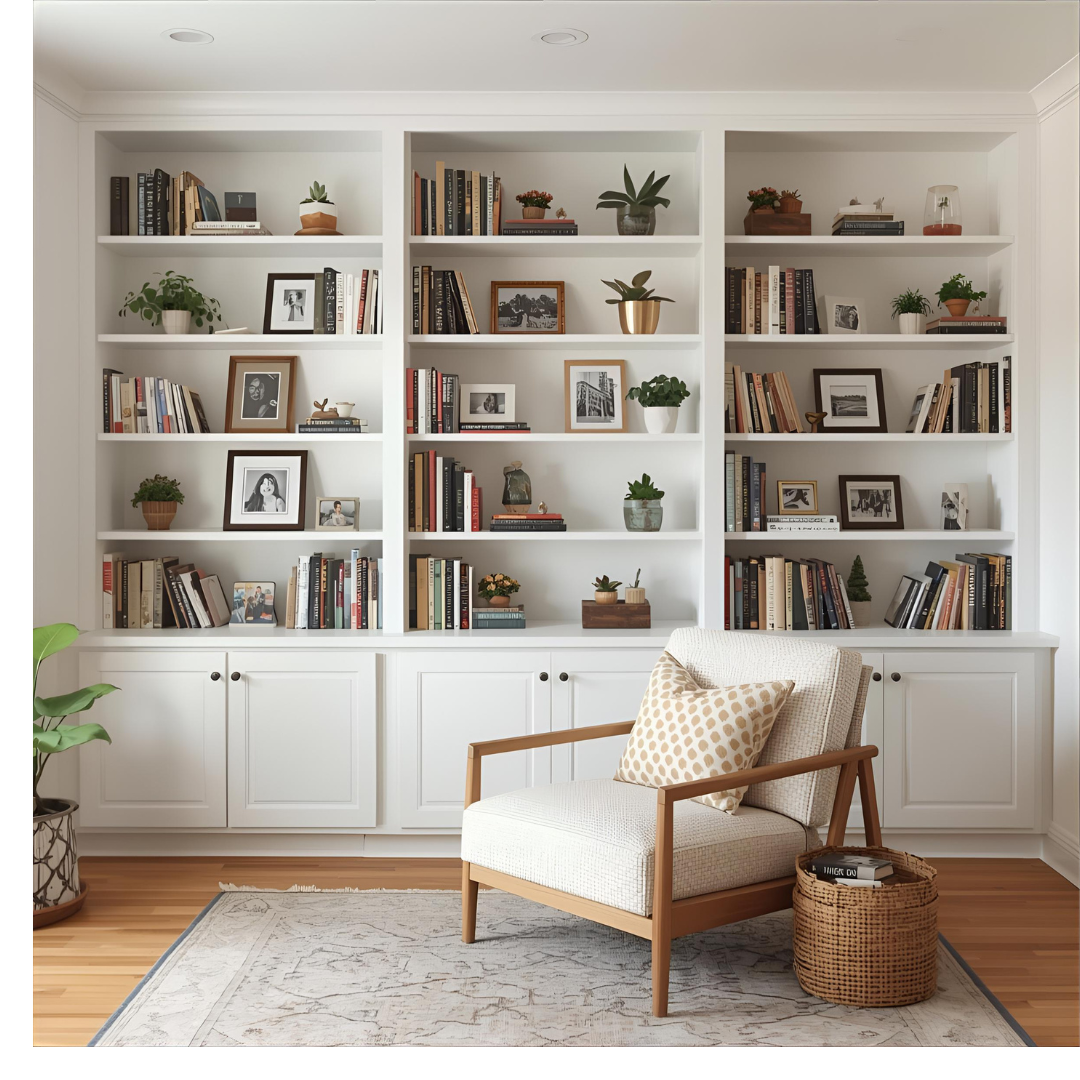
Envisioning a space adorned with a grand library wall, reminiscent of classic films featuring rolling ladders and towering shelves brimming with books, can be a dream for many homeowners. However, the reality of my own space was far from that vision, with plain drywall and a modest layout. Yet, the desire for that warm, inviting atmosphere led me to create my own built-in bookshelves, providing a solution that felt both personal and transformative.
Despite the initial challenges I faced while embarking on this DIY journey, including miscalculations and moments of doubt, the process gradually revealed itself as more than just a project; it became a means to elevate the ambiance of my home. The shelves evolved from a mere functional element into a statement piece that breathed new life into the room.
Through this experience, I discovered that built-in bookshelves have the potential to redefine a space, offering both aesthetic appeal and practical storage solutions. The impact of such an installation goes beyond simple organization; it creates a sense of character and charm that can significantly enhance the overall feel of any room.
Planning: The Part Most DIYers Overlook (But Shouldn’t)
In the excitement of pursuing a DIY project, it’s easy to overlook the importance of proper planning. Initially, I was tempted to dive right into the construction phase by quickly measuring the wall and estimating the dimensions, which almost led to a costly mistake. Fortunately, I paused to reassess, realizing that dedicating a few hours to meticulous planning would save me from potential setbacks down the line.
To begin, take accurate measurements of the wall where the shelves will be installed. It’s crucial to measure at multiple points to account for any irregularities in the structure. Walls and ceilings aren’t always perfectly square, so having precise measurements is key to ensuring a seamless fit.
Additionally, sketching out your design—whether on graph paper or using design software—can provide clarity and help visualize the final product. This step is essential for determining the height and layout of your shelves, which will significantly influence the overall design of the built-ins.
Step 1: Constructing the Base for Built-In Bookshelves
Every successful project begins with a solid foundation, and built-in bookshelves are no exception. The base, constructed from 2x4s, may not be the most exciting aspect, but it plays a crucial role in the stability and alignment of the entire structure. Initially, I underestimated the effort it would take to get this part right, and my first attempt was far from level.
After multiple attempts to adjust the base, I learned an important lesson about the significance of leveling. The floor imperfections became evident as I struggled to achieve a straight line, forcing me to use shims for adjustments. It was a reminder that the foundation sets the tone for the entire project, and a poorly constructed base could lead to misalignment of the shelves later on.
Ultimately, my persistence paid off when I succeeded in leveling the base. Although it may not have been perfect, it was sufficient for the purpose of supporting the shelves. From that point forward, I felt a renewed sense of commitment to the project, realizing that the base is the unsung hero of any built-in structure.
Step 2: Assembling the Box Frames for Your Built-In Bookshelves
With the base securely in place, it was time to tackle the box frames that would serve as the core of my built-in bookshelves. I began by cutting pieces of ¾-inch plywood for the sides, top, and bottom of each box. However, I quickly discovered that maneuvering full sheets of plywood was more challenging than I anticipated, especially outdoors where the wind seemed intent on complicating my cuts.
My initial cuts were far from perfect—each attempt resulted in crooked edges and uneven lines. However, after some trial and error, I managed to create a few satisfactory pieces. Securing the first box together, I quickly realized that even the slightest misalignment could lead to a wobbly structure, prompting me to redo the assembly until I achieved a more acceptable result.
Once the boxes were assembled, I positioned them on the leveled base. Panic set in when I noticed gaps between the boxes and the wall, but I reminded myself that most walls are not perfectly straight. Recognizing that trim would be my ally in this situation, I continued with the assembly rather than dwelling on minor imperfections.
Step 3: Securing Built-In Bookshelves to the Wall
The next phase of the project involved securing the box frames to the wall, a critical step that ensured the stability of my built-in bookshelves. Using a stud finder to locate the wall studs, I proceeded with cautious excitement, hoping that my efforts would forge a solid connection between the boxes and the wall.
As I drove in the first long screw, I felt a wave of relief wash over me as the box tightened against the wall. This moment marked a significant turning point in the project, transforming the individual boxes into a cohesive unit. I continued to attach each box to the studs, ensuring that they were firmly anchored and would withstand the test of time.
However, in my eagerness to secure the frames, I made the error of skipping the pre-drilling step on one panel. The resulting crack was disheartening, but I acknowledged it as a learning experience. The overall strength of the structure was worth the effort, and despite a few blemishes, I could finally see the vision of my built-ins coming to life.
Step 4: Shelves and Spacing
This stage was the moment I could finally express my creativity. I began by placing a stack of books and a few decorative baskets on the floor to visualize the spacing I desired for my shelves. I decided on twelve inches for the books, with sixteen inches allocated for baskets, and left one shelf taller for a plant that would serve as a vibrant accent in the display.
As I cut the boards to size and prepared to attach them, I realized that holding the shelf with one hand while trying to drill with the other was a less-than-ideal strategy. After a few frustrating attempts, I opted to use a scrap board as a support, which made the process significantly smoother. That small adjustment changed everything, making the installation of the shelves much more manageable.
Reflecting on my experience, I wished I had painted the interior of the shelves before installation. Trying to navigate the tight space with a brush was a cumbersome task, leading me to recommend that future builders prioritize painting before assembly for a hassle-free finish.
Step 5: Add Face Frames
At this point, the built-ins began to take on a polished appearance thanks to the addition of face frames. I cut strips of 1×2 poplar and secured them using glue and a brad nailer, resulting in an immediate transformation. The frames lent a sense of thickness and custom craftsmanship that elevated the overall look of the shelves.
Initially, I attempted to cut all the face frames at once, thinking it would save time. However, I quickly realized that the walls and plywood were not perfectly straight. This led to gaps that required reworking the measurements and cutting each piece individually, albeit at a slower pace. In the end, the meticulous approach paid off.
Attaching the frames was oddly satisfying, with the rhythmic sound of the brad nailer punctuating the air. After filling the nail holes and giving the frames a quick sand, I ran my hand along the smooth surface, feeling a sense of accomplishment as the built-ins began to resemble a cohesive piece of furniture.
Step 6: Trim, Molding, and Details
This stage was where the magic truly happened, as the addition of trim transformed the shelves from a DIY project into a stunning feature of the room. I started with the baseboard trim, which helped tie the built-ins into the overall aesthetic of the space. Then came the crown molding, which proved to be a more challenging task than I had anticipated.
My first several cuts for the crown molding were embarrassingly off, leading to a few choice words that echoed through the house. However, after persistence and a few adjustments, I finally achieved a perfectly fitting piece that brought a smile to my face. The satisfaction of seeing the molding in place was a rewarding moment in the process.
To finish off the trim work, I applied caulk to fill any gaps or imperfections, ensuring a seamless transition between the shelves and the wall. A quick sanding of the nail holes left the surface smooth and ready for painting. The room was now filled with the scent of primer as I prepared to apply the final coat of paint, feeling a sense of pride in the work I had accomplished.
Painting and Finishing
In preparation for painting, I made sure to prime everything, especially focusing on the edges of the plywood that had a tendency to absorb paint. After applying a satin white finish to match my trim, I could see the transformation taking shape. For those who prefer a rustic look, a stain could be a suitable alternative, but it’s important to edge-band raw plywood to ensure a polished finish.
As I applied the final coats, I was reminded of the labor that had gone into each step of the process. The combination of color and texture breathed life into the shelves, making them feel like a true part of the home. Standing back to admire the finished product, I felt a mix of exhaustion and pride, knowing that every challenge I faced along the way was worth it.
Built-In Bookshelves Cost Breakdown
After tallying the costs of my project, I found that my total expenses came to just under $750. While this may seem like a significant investment, it was still substantially less than the estimates I received from contractors, which ranged from $3,000 to $5,000. My DIY approach not only saved me money but also provided a personal touch that wouldn’t have been achieved with pre-made options.
Breaking down the costs revealed where I allocated my budget: approximately $325 for the five sheets of ¾” birch plywood, $40 for the 2×4 lumber used for the base, $120 for the poplar face frame boards, $150 for the crown and baseboard trim, and $65 for primer and paint. These figures highlight the feasibility of undertaking such a project without breaking the bank.
Ideas to Customize Your Built-Ins
The completion of my built-in bookshelves opened the door to endless design possibilities. Customization is one of the most rewarding aspects of building your own shelves, as you can tailor them to fit your personal style and practical needs. For instance, I considered incorporating a built-in desk to create a functional workspace or adding cabinets beneath the shelves to cleverly hide clutter while maintaining a clean aesthetic.
Another idea that enhanced the overall ambiance of my shelves was the addition of under-shelf lighting. I installed puck lights beneath one of the shelves, and the effect was remarkable—transforming the space into a cozy reading nook and showcasing my collection beautifully.
Ultimately, the flexibility in design allows for a unique blend of functionality and creativity, ensuring that your built-ins serve both aesthetic and practical purposes.
Mistakes I Made (So You Don’t Have To)
Reflecting on my DIY journey, I can pinpoint several missteps that could have been avoided with a bit more foresight. One of the most significant oversights was the failure to account for electrical outlets in my initial planning. I found myself scrambling to notch around an outlet at the last minute, which added unnecessary stress to an already complex project.
Additionally, I learned the hard way the importance of painting before installation. Attempting to navigate the tight spaces of the shelves with a paintbrush was a cumbersome and frustrating experience—one I wouldn’t wish on anyone.
Lastly, I initially skimped on the trim during the first round of installation, leading to an unfinished look. It wasn’t until I added crown molding that the built-ins truly felt complete. Each of these lessons reinforced the importance of careful planning and attention to detail, ultimately enhancing the success of my project.