Cleaning a shower, while necessary, isn’t something that most people look forward to doing. So it makes sense that when deciding to replace a shower, finding one with a fairly easy to clean material can become a priority. But what showers are the easiest to clean? In this post, we answer this for you.
The easiest shower materials to keep clean are smooth surfaces that contain very few hiding places for mildew and mold. That being said, fiberglass and acrylic tend to stand out as the best materials for simple and easy shower cleaning. Here are the steps involved in cleaning fiberglass and acrylic showers:
- Prep The Shower Area
- Create Ventilation
- Run The Shower For 5-7 Minutes
- Apply Your Cleaning Solution
- Wipe/Scrub The Shower Surfaces
- Rinse The Shower
Now, please keep reading as we cover each step in more detail. We’ll also answer how often you should clean your shower and provide mold prevention tactics.
Steps to Clean Your Acrylic or Fiberglass Shower

Cleaning your shower can take anywhere from ten to 30-minutes depending on the shower’s size and its current state of cleanliness.
Things you’ll need:
- Rubber cleaning gloves
- Commercial cleaner or homemade cleaning solution
- Stain remover
- Stiff-bristled brush
- Soft sponge
- Rubber gloves
- Cleaning cloth
Step 1. Prep The Shower Area
Before cleaning your shower, it’s best to prep the area so that you can clean it without interruption. This means removing any hanging towels or sponges from the grab bars or racks, removing all accessories such as razors, loofahs, and soap/shampoo bottles. After removing your personal items, it’s best to check in the bottom of their surfaces for mildew or mold. If you see signs of either, use your cleaning rag and solution to clean (and dry) them so that they won’t transfer the germs back to your clean shower.
Check out this loofah sponge on Amazon.
Step 2. Create Ventilation
Since you will be working with chemicals that aren’t the safest to inhale (because of their fumes), it’s best to open up any windows to the bathroom and the bathroom door as far as possible. It’s also a good idea to check the instructional label on the back of your cleaning product to determine any precautions you need to take regarding fumes or physical contact with the solution.
Check out these rubber gloves on Amazon.
Step 3. Run The Shower For 5-7 Minutes
Running the shower for five to seven minutes using hot water is an old cleaning trick that works well to help lift stubborn stains and caked-up dirt that may lay in the corners and crevices of your shower area (especially on the shower floor). The steam emitted from the shower help to minimize the amount of elbow grease needed to scrub away tough stains.
Check out this cleaning cloth set on Amazon.
Step 4. Apply Your Cleaning Solution

If you use a homemade cleaning solution (such as vinegar or baking soda-based solutions) for your bathroom, now is the time to prepare it. Otherwise, spray your commercial shower cleaner onto the shower walls starting on the showerhead’s left side and work your way to the right. After you’ve covered all of the walls, spray the solution on the shower floor. Depending on how dirty your shower is and the type of cleaner that you’re using, you may want to let the cleaner penetrate the shower surfaces anywhere from five to twenty minutes before removing it.
Check out this Weiman shower cleaner on Amazon.
Step 5. Wipe/Scrub The Shower Surfaces
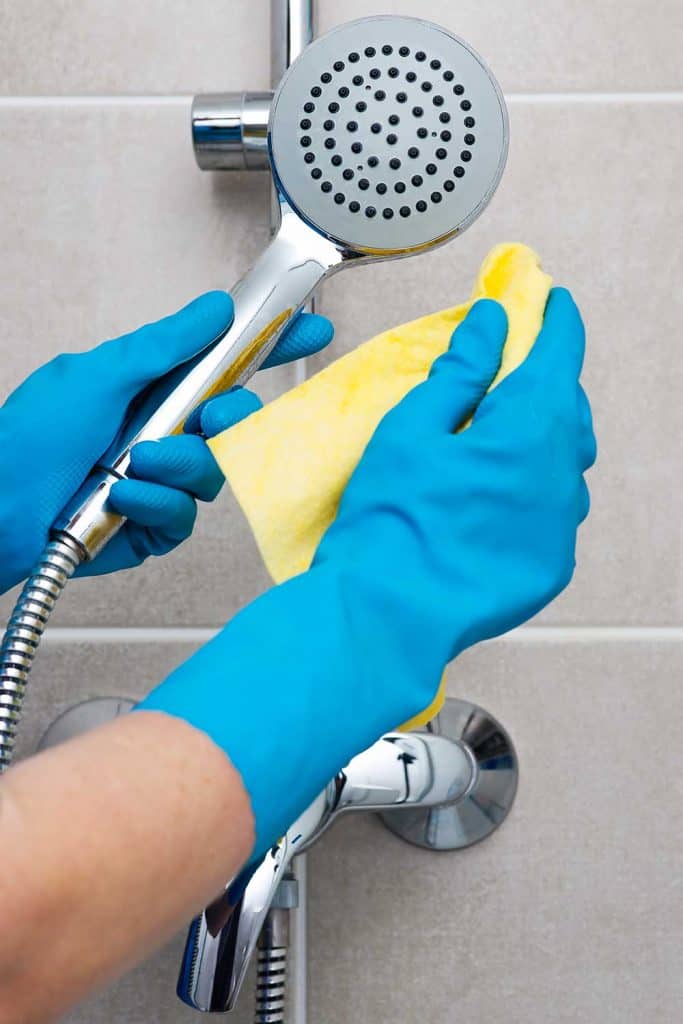
Once you’ve allowed the cleaner to sit for a few minutes, use your stiff-bristled brush or cleaning cloth to wipe down and scrub the shower walls and floors. Be sure to pay special attention to the grout between the tiles (if your shower has tiles) as well as the corners of the shower floor where dirt and debris are known to accumulate. If your scrub brush can’t reach inside the corners of your shower, a disposable toothbrush can work great to reach these areas.
Check out this stiff-bristled cleaning brush set on Amazon.
Step 6. Rinse The Shower
After you have applied your cleaning solution and removed any tough stains, turn on the shower and rinse it down with warm water. It may also help to grab a drinking cup from the kitchen to capture water and douse the shower walls– especially if your shower head doesn’t tilt vertically. You can also just rinse your cleaning cloth and wipe down the walls with it.
Follow the warm rinse up with a cold rinse to help wash off any remaining soap residue. Next, use your cleaning cloth to wipe down the shower walls and floor and remove any lingering water droplets (it doesn’t need to be completely dry, just remove any standing water). If you have an exhaust fan in your bathroom, turn it on and let it run for the next 10 to 15-minutes to help air out the bathroom.
Check out this fiberglass stain remover on Amazon.
Fiberglass and Acrylic Cleaning Precautions:
To ensure the longevity of your fiberglass or acrylic shower, it’s best to stay away from the following products when it comes to keeping it clean:
- Abrasive cleaners such as scouring pads, Scratch-free Comet, and Soft Scrub
- Products that contain acetone or ammonia
- Crystal containing drain cleaners
- Cleaning products that come in aerosol spray cans
- Harsh disinfectants such as Lestoil, Dow Disinfectant, and Lysol
- Any leave-on or “overnight” commercial surface cleaners
How Do You Stop Mold From Growing In Your Shower?
Clean Up Spills
Prevent mildew from developing by draining or mopping up pooled water as soon as possible. After you take a shower or bath, use a soft sponge to help usher settled water toward the shower drain–the less water on the shower’s surface, the less likely chance for mold to develop. For heavy pools of water outside of the shower, use drying towels to soak it up.
Keep The Bathroom Ventilated
Mildew thrives and grows in damp areas, and this makes bathrooms an ideal location for mildew-causing bacteria. Always turn on your exhaust fan before you begin your shower and let it run for about 15-minutes after you’ve finished; this can help eliminate excess humidity and moisture in the bathroom. It also ensures that the ceilings and walls (which may not be tiled) do not develop mold and water stains prematurely.
Repair Leaks
If you have any small leaks coming from your toilet or beneath the sink, these can be prime areas for mold to develop. Putting off necessary bathroom repairs increases the possibility that the repair will worsen over time and that mold or mildew will develop in the area of the leaks.
Let In Fresh Air & Sunlight
Cool, dark areas are breeding grounds for mildew. This is why it’s best to open up the window in your bathroom (if you have one) to let in direct sunlight as well as fresh air–it offers a quick way to dry out your bathroom. Also, be sure to leave your shower curtains extended and open up the bathroom door completely to let some of the humidity out of the bathroom after you shower.
Use Mold-Resistant Paint
You can also use mold-resistant paint in your bathroom to ward off mold growth on the walls. Mold-resistant paint contains antibacterial agents that work to prevent the accumulation of bacteria and fungi. Does this mean that your bathroom walls will be mold-resistant forever? No. However, mold-resistant paints can slow down the accumulation of mold on the walls–given that the bathroom is also aired out frequently.
How Often Should You Clean Your Shower?
Generally, health experts agree that bathrooms (shower areas included) should be disinfected at least once a week and should be deep-cleaned at least once a month. General cleaning involves cleaning the sink, shower/tub, and toilet area, whereas deep cleaning encompasses mopping, scrubbing, and disinfecting every surface within the bathroom. Disinfecting your bathroom every week is essential to a healthy home environment, as pathogens could be living on the various surfaces within your bathroom for weeks and even months at a time.
Many people believe that the toilet and floor are the places most prone to harboring bacteria and pathogens. However, areas such as corners, shower walls, and other nooks and crannies can also be tone to many germs. These germs can include pathogens such as salmonella, E. coli, campylobacter, and shigella. They can also include staphylococcus (aka “staph”), which is known to cause various skin infections. Athlete’s foot is also a common fungus found on shower floors. Other residual fungi and pathogens can aggravate allergies and issues with asthma sufferers.
Should The Shower Material Reach The Ceiling?
Whether or not the shower material reaches the ceiling is a matter of personal preference and depends on the type of shower that you purchase. Generally, shower kits are designed to reach about six feet in height and high gloss paint is typically used on the wall above the shower (being that it’s extremely durable and typically mold-resistant).
On the other hand, there are reasons why you may want to install shower tiles to the ceiling. Let’s look at a few of them.
It Prevents the wall and drywall from getting wet
Over time, shower walls may develop mold or mildew stains due to continuously being exposed to moisture. Tile can act as a water-proof barrier for the drywall.
It Makes The Shower Look Bigger
Tiling a shower wall up to the ceiling can help the space appear much larger than it actually is, which is a well-known design trick used by contractors. The good thing is, it typically doesn’t require an exorbitant amount of money to have the contractor (who’s already installing your shower) take the tile to the ceiling. You’re only looking at approximately an additional two to three hours of work.
Creates a Modern Feel
Taking the tile to the ceiling can also add a modern decor to the shower area. Tile always stands out more than paint, and when it covers a wall, it can add a sleek and polished appearance to a bathroom that may otherwise be more traditional in its features.
Wrapping Things Up
Fiberglass and acrylic showers are pretty easy to clean. Be sure to clean and disinfect your shower at least once a week to prevent the development of mold and other dangerous pathogens.


